Comprehending Gadget Repair: Trick Considerations for Effective Display Fixing and Motherboard Repair
When it comes to gadget repair, comprehending the nuances of screen and motherboard concerns is essential. You'll require the right tools and a grasp of different display types to take on fixings successfully.
Important Tools for Display and Motherboard Fixes
When dealing with screen and motherboard repair work, having the right devices is vital for success. A spudger or plastic pry device aids you securely open tools without harming the covering.
For screen fixings, a suction mug can raise the screen without cracking it. You ought to additionally have a heat gun or hairdryer handy to loosen up adhesive. A multimeter is invaluable for diagnosing motherboard concerns, allowing you to look for shorts or faulty links.
Ultimately, an anti-static wrist band will certainly protect delicate digital parts from fixed electrical power. With these devices in your toolbox, you're well-equipped to deal with many screen and motherboard repair services effectively and efficiently.
Comprehending Different Screen Types and Their Repairs
Several individuals do not realize that screens come in numerous kinds, each with its very own repair work factors to consider. On the other hand, OLED and AMOLED displays use vivid colors and much deeper blacks, however they're much more delicate, needing specialized techniques for repair services.
Some displays have additional layers, like touch sensing units, which can make complex fixings. Understanding these differences will certainly save you time and initiative, guaranteeing a smoother fixing procedure.
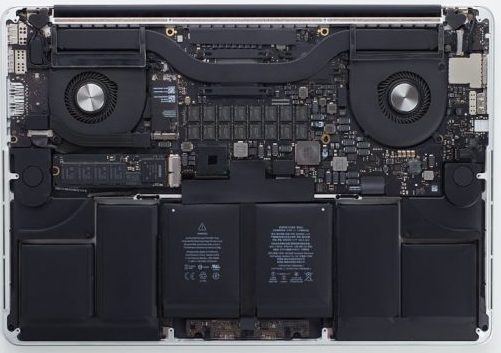
Typical Motherboard Issues and Diagnostic Techniques
When your gadget starts acting up, the motherboard can be the wrongdoer. You'll want to recognize the indicators of motherboard failure and recognize how to use diagnostic devices efficiently. Let's check out common repair methods to get your gadget back in functioning order.
Indicators of Motherboard Failing
Although a computer's motherboard is often taken for granted, identifying the signs of its failure can save you money and time in the lengthy run. If your computer suddenly won't boot or exhibits arbitrary shutdowns, that's a warning. You may additionally notice unusual beeping appears throughout start-up, which typically indicate equipment problems. Constant crashes or freezes, particularly when running requiring applications, can signal a stopping working motherboard. In addition, if peripherals like USB tools aren't identified or your system experiences overheating, these signs and symptoms might indicate motherboard problems. On a regular basis inspecting for physical damages, like burned areas or swelling capacitors, is necessary. Being proactive about these indicators will certainly aid you attend to prospective failures before they intensify.
Diagnostic Tools Introduction
Identifying possible motherboard problems is simply the initial step; recognizing just how to diagnose them effectively can conserve you a great deal of frustration. To start, you'll intend to have a multimeter convenient. This tool aids determine voltage and resistance, enabling you to determine damaged elements. Next off, consider utilizing a BLOG POST (Power-On Self-Test) card. It gives you mistake codes that can pinpoint certain issues throughout boot-up. Additionally, software diagnostics can provide understandings into equipment efficiency, aiding you spot abnormalities. Don't overlook visual examinations either; melted elements or protruding capacitors can signify severe problems. By using these analysis devices, you can improve your troubleshooting process and deal with motherboard problems with self-confidence.
Typical Fixing Techniques
Repairing typical motherboard issues calls for a systematic method to guarantee you tackle the issue efficiently. Recognize the signs-- unresponsive screens, random closures, or failure to boot. Eventually, a methodical approach not only repairs the present concern however also enhances your total repair abilities.
Step-by-Step Overview to Display Replacement
Replacing a busted screen can seem intimidating, however with the right devices and a little patience, you can tackle it yourself. Put the prying tool right into the void to thoroughly separate the display from the tool's body.
Next, detach any cables affixed to the screen. As soon as you have actually eliminated the broken display, straighten the brand-new screen and attach the cables firmly. Press the display right into location, making sure it fits snugly. Reinsert the screws you formerly got rid of, and offer your gadget a quick test to confirm every helpful resources little thing works. Lastly, power it on, and appreciate your recently replaced display!
Repairing Motherboard Troubles: Tips and Tricks
When your gizmo isn't powering on or acting oddly, it may be a motherboard issue. You'll intend to acknowledge common symptoms and gather the right analysis tools prior to you begin repairing. Allow's discover the essential actions to determine and repair those annoying motherboard troubles.
Usual Symptoms Identified
Recognizing usual symptoms of motherboard problems can save you time and aggravation throughout troubleshooting. If your device won't power on, that's typically a clear indication of a motherboard problem. You could also observe random system accidents, which can show defective elements. Additionally, if you listen to beeping sounds during start-up, it's your motherboard attempting to interact a mistake. Overheating can also be a symptom, recommending that there's a concern with power shipment or air conditioning. If peripherals aren't acknowledged or you see altered graphics, these could aim to motherboard malfunctions. By recognizing these symptoms early, you can take the essential actions to detect and fix your device efficiently. Keep in mind, addressing these indicators quickly can avoid more damage.
Diagnostic Tools Overview
To successfully troubleshoot motherboard troubles, having the best diagnostic tools at your disposal can make all the difference. Start with a multimeter to inspect voltage degrees and continuity on various elements. This device aids you determine power concerns or brief circuits. Next off, make use of a POST (Power-On Self-Test) card to detect boot troubles by presenting error codes that suggest particular failings. A thermal video camera can also be important, as it helps spot getting too hot elements that may result in motherboard failing. Ultimately, having a reliable power supply tester guarantees that your power resource isn't creating the concerns. By utilizing these tools, you'll get valuable understandings, enabling you to determine troubles more properly and effectively.
Repair Work Process Steps
Start by powering down the gadget and separating it from any power resource. Next, eliminate the back cover to access the motherboard. Try to find any visible signs of damage, like scorched parts or loosened links. If you detect anything uncommon, document it for further evaluation. Make use of a multimeter to inspect the voltage across various components of the motherboard, guaranteeing they're running within acceptable arrays.

Safety Safety Measures During Gadget Services
While repairing gizmos can be fulfilling, it's important to prioritize your safety and security throughout the procedure. Usage proper tools to stay clear of slides or injuries; a committed toolkit can make all the distinction.
Put on security glasses to shield your eyes from tiny particles, and consider gloves More Info to stay clear of cuts or scrapes. Be careful with fragile components, as they can conveniently break. If you're managing batteries, confirm they're not swollen or leaking, as this can pose a major threat.
Acquaint yourself with the products you're collaborating with, and never rush the repair work. Taking your time will certainly help you stay focused and secure. Complying with these precautions will add to a smoother and safer repair experience.
When to Seek Specialist Aid for Fixings
Even with safety preventative measures in see area, there are times when dealing with a device repair might be even more than you negotiated for. They have the devices and experience to examine and repair damages that could worsen if left unattended.
An additional indication is when you're not sure regarding the repair service procedure. Bear in mind, attempting a repair without the best knowledge can lead to additional damage and greater costs.
Regularly Asked Concerns
The length of time Does a Common Screen Repair Work Take?
A typical screen repair typically takes around thirty minutes to an hour, depending on the gadget and intricacy - MacBook screen and Motherboard repairs in South Africa. If you have actually got the right devices and parts, you can quicken the procedure substantially
Can I Replace a Screen Myself Without Experience?
You can replace a display on your own without experience, yet it's dangerous. You may harm your device even more or nullify the service warranty. If you're unclear, consider looking for professional assistance for a much more dependable repair.
What Is the Price Array for Motherboard Repair Works?
The expense for motherboard fixings normally ranges from $100 to $300, depending upon the damage and the tool. It's important to get quotes from several service center to assure you're obtaining a fair cost.
Are Reconditioned Components as Reliable as New Ones?
Refurbished components can be trustworthy, however it relies on the high quality and source. You need to check warranties and testimonials before buying, as some refurbished things perform virtually along with brand-new ones, while others might not.
How Can I Protect Against Future Display Damage?
To avoid future screen damages, you need to invest in a durable instance, use display protectors, avoid putting your tool in perilous areas, and manage it with treatment during everyday tasks. Remain conscious of your environments!